Pages

How to build a rocking chair with durable and high-quality materials

Building Your Dream Rocking Chair: A Guide to Durability and Quality

Hey there, fellow woodworking enthusiasts! So, you're thinking about building a rocking chair? Fantastic! There's something incredibly satisfying about crafting a piece of furniture that's both beautiful and functional, something you can relax in for years to come. But let's be honest, rocking chairs aren't exactly quick projects. To build one that truly lasts, you need to choose your materials carefully and execute the build with precision. Let's dive in!

Choosing the Right Wood: The Foundation of Your Masterpiece

The heart of any sturdy rocking chair lies in the wood you select. Forget about flimsy pine – we're aiming for longevity here! Think strong, durable hardwoods that can withstand years of rocking and relaxing.

Hardwood Heroes: Your Top Choices

*
  • Oak: A classic choice known for its strength, durability, and beautiful grain. Red oak and white oak are both excellent options, each with slightly different characteristics.
  • *
  • Maple: Incredibly hard and strong, maple is resistant to wear and tear. It's also a beautiful wood with a smooth finish.
  • *
  • Cherry: This rich, reddish-brown wood adds elegance to any piece. It's moderately hard and durable, making it suitable for rocking chairs, especially if you're willing to treat it well.
  • *
  • Hickory: Known for its incredible strength and flexibility, hickory is a top choice for rocking chairs that will see a lot of use. It's also surprisingly shock-resistant.
  • *
  • Walnut: While slightly softer than some other options, walnut's beautiful dark color and rich grain make it a popular choice. Just be aware that it might require a bit more care over time.
  • Remember to choose wood that's properly dried (kiln-dried is best). This prevents warping and cracking down the line. Check for any knots or imperfections that could compromise the structural integrity of your chair. A few small, tight knots are okay, but avoid anything large or loose. Think of it like building a house – you wouldn't use weak bricks, would you?

    Designing Your Rocking Chair: Form and Function

    Before you even pick up a saw, you need a plan. There are countless rocking chair designs out there, from classic Adirondack styles to more modern interpretations. You can find free plans online or purchase professionally designed plans from woodworking suppliers.

    Considerations for Your Design:

    *
  • Comfort: Think about the seat height, depth, and angle. Consider the overall ergonomics of the chair – you want it to be comfortable for extended periods.
  • *
  • Style: Choose a design that complements your décor. Do you prefer a traditional, rustic look, or something more contemporary?
  • *
  • Rocking Motion: The curve of the rockers is crucial for a smooth, gentle rocking motion. A poorly designed rocker can feel jerky or unstable. Take your time studying the plans you choose to ensure a comfortable ride.
  • *
  • Materials List: Make sure to have a complete list of materials before you start. Nothing's worse than being halfway through the project only to discover you're missing a key piece of lumber!
  • Essential Tools and Techniques: Gathering Your Arsenal

    Building a rocking chair requires a decent collection of woodworking tools. Don't worry, you don't need every tool in the shop, but having the right ones will make the process much smoother (and safer!).

    Essential Tools:

    *
  • Table saw: For cutting the lumber to size accurately.
  • *
  • Planer: To ensure the wood is perfectly smooth and flat.
  • *
  • Jointer: For creating perfectly straight edges.
  • *
  • Router: For shaping and creating decorative details.
  • *
  • Drill press: For precise drilling of holes.
  • *
  • Sandpaper (various grits): For smoothing the surfaces.
  • *
  • Clamps: To hold pieces together while the glue dries.
  • *
  • Measuring tape and square: Accurate measurements are crucial!
  • Construction: Putting it All Together

    Now for the fun part! This is where your design and careful planning come into play. Follow your chosen plans meticulously, paying close attention to details like joint types and glue application.

    Key Construction Tips:

    *
  • Accurate Cuts: Make sure all your cuts are precise. Even a small error can throw off the entire project.
  • *
  • Strong Joints: Use appropriate joinery techniques (mortise and tenon, dowel joints, etc.) to create strong, durable joints. Don't skimp on glue!
  • *
  • Proper Glue-Up: Use a high-quality wood glue and clamp everything tightly. Allow ample drying time before proceeding to the next step.
  • *
  • Sanding: Take your time sanding – smooth surfaces are crucial for both aesthetics and comfort. Start with coarser grits and gradually work your way to finer grits.
  • *
  • Finishing: Choose a finish that protects the wood and enhances its beauty. Consider polyurethane, varnish, or even a natural oil finish.
  • Finishing Touches: The Perfect Polish

    Once the chair is assembled and sanded, it's time for the finishing touches. This is where your rocking chair truly comes alive.

    Adding the Finishing Flourishes:

    *
  • Stain (Optional): If you want to enhance the wood's natural color or add a different hue, apply a stain according to the manufacturer's instructions. Let it dry completely before applying the finish.
  • *
  • Topcoat: Applying several thin coats of a durable finish (polyurethane or varnish) will protect the wood from scratches, moisture, and wear and tear. Remember to sand lightly between coats for a smooth, even finish.
  • *
  • Hardware: If your design incorporates any hardware (screws, bolts, etc.), make sure they're high-quality and securely fastened.
  • Commonly Asked Questions

    Q: How long does it take to build a rocking chair? A: It depends on your experience level and the complexity of the design. A simple rocking chair might take a weekend for an experienced woodworker, while a more complex design could take several weeks. Q: Can I use plywood for a rocking chair? A: While you can *technically* use plywood, it's not ideal for a rocking chair that's meant to last. Hardwood is much stronger and more durable. Plywood can be used for certain parts, but the main structural components should be hardwood. Q: How do I ensure the rocking motion is smooth? A: Carefully follow your plans regarding the rocker curve. The shape and angle of the rockers are critical for a smooth, comfortable rocking motion. Q: What kind of glue should I use? A: Use a high-quality wood glue designed for strong joints. Titebond is a popular and reliable choice. Q: How do I prevent the chair from squeaking? A: Properly assembled joints and careful sanding will minimize squeaking. If you still experience squeaking, you can try lubricating the joints with a bit of wax or silicone spray. Building a rocking chair is a rewarding experience. It's a chance to connect with the craft of woodworking, creating something beautiful and functional that you can enjoy for years to come. Remember to take your time, be patient, and most importantly, have fun!
    Read More..

    How to build a buffet sideboard with hidden storage

    Craft Your Dream Buffet: A Guide to Building a Sideboard with Hidden Storage

    Tired of cluttered dining rooms and overflowing kitchen counters? A beautifully crafted buffet sideboard with cleverly concealed storage can transform your space. This detailed guide empowers you to build your own, providing ample hidden storage for linens, tableware, and more. Forget generic, mass-produced furniture – let's create something truly unique and tailored to your needs!

    Planning Your Masterpiece: Design and Materials

    Before you even pick up a saw, meticulously plan your buffet's dimensions and design. Consider the available space in your dining area or kitchen. Will it be a long, low piece, or taller and more compact? Sketch your design, noting the desired height, width, and depth. Consider the style – modern minimalist, rustic farmhouse, or classic elegance – and choose materials accordingly. Solid wood (like oak, maple, or cherry) offers durability and timeless appeal, while plywood provides a more affordable alternative. For a touch of elegance, integrate glass-fronted cabinets. Don't forget your hidden storage compartments – decide on their size, placement, and accessibility.

    Choosing Your Wood and Hardware

    Selecting the right wood significantly impacts the final look and feel. Oak offers a robust, traditional appearance, while maple provides a cleaner, lighter aesthetic. Cherry wood boasts rich, warm tones. If budget is a concern, high-quality plywood provides a stable base, easily stained or painted to match your desired style. Think carefully about your hardware: knobs, pulls, and hinges should complement the overall design. Consider the weight of your doors and drawers when selecting hinges – robust hinges are essential for heavy doors.

    Construction: Bringing Your Vision to Life

    Now for the fun part! Armed with your detailed plans and chosen materials, you'll begin the actual construction. Precise cuts are essential; use a miter saw for clean, accurate angles. Assemble the carcass of the buffet – the main structure – using wood glue and screws. Reinforce joints with dowels or biscuits for added stability. For the hidden storage, consider building framed compartments within the main structure, creating secret spaces behind hinged doors or drawers. Remember, accuracy and patience are key here!

    Building the Hidden Compartments

    The magic of this project lies in the expertly crafted hidden storage. Carefully measure and cut the wood for the compartments. Consider incorporating adjustable shelves for versatile storage solutions. For a truly hidden effect, use flush-mounted hinges that seamlessly integrate with the doors or drawer fronts. Think about adding small details like felt lining to prevent scratches on fine china or silverware.

    Finishing Touches: Adding the Polish

    Once the structure is complete, it's time to bring out the character. Sand all surfaces thoroughly to achieve a smooth finish, paying close attention to corners and edges. Apply your chosen finish – stain for a natural wood look, or paint for a vibrant pop of color. Several coats are recommended for optimal protection and durability. Install the doors, drawers, and hardware with precision. Finally, add those finishing touches – perhaps a decorative molding or subtle trim – to elevate your creation to a true masterpiece.

    The Final Reveal

    Step back and admire your handiwork. You've successfully built a beautiful and functional buffet sideboard with hidden storage! This piece not only adds storage solutions but elevates the aesthetic of your dining room or kitchen. This custom-built piece reflects your individual style and provides a lasting sense of accomplishment. Enjoy the pride of crafting something truly special for your home.

    Beyond the Basics: Customization Options

  • Integrated lighting: Add LED strip lights inside the cabinets for a dramatic effect and easy visibility.
  • Wine rack: Incorporate a built-in wine rack for the wine enthusiast.
  • Pull-out spice rack: Maximize space by including a pull-out spice rack for the avid cook.
  • Charging station: Add discreetly placed power outlets for charging devices.
  • The possibilities are endless – let your creativity guide you!

    Read More..

    Beginner-Friendly Shaker-Style Woodworking Plans (Step-by-Step)

    Beginner-Friendly Shaker-Style Woodworking Plans: Build Your First Masterpiece!

    Shaker furniture, known for its clean lines, simple elegance, and enduring functionality, might seem intimidating to a beginner woodworker. But don't let that fool you! With the right plan and a little patience, you can craft a beautiful Shaker-style piece that you'll cherish for years to come. This guide provides step-by-step instructions for creating a simple project, perfect for building your confidence and skills.

    Choosing Your Project: A Simple Shaker Box

    We'll start with a classic: a Shaker-style box. Its straightforward design minimizes complex joinery, allowing you to focus on mastering fundamental woodworking techniques. You'll learn to cut precise joints, apply finishes, and appreciate the beauty of simplicity. This box can serve as a jewelry box, a storage container, or even a decorative accent piece – the possibilities are as limitless as your creativity! Remember to choose a wood you enjoy working with – something readily available at your local lumberyard is a great starting point.

    Gathering Your Materials

    Before you begin, gather your materials. You'll need:

    • Wood (pine, poplar, or maple work well for beginners)
    • Wood glue
    • Clamps (at least two)
    • Hand saw or circular saw
    • Chisel
    • Sandpaper (various grits, from coarse to fine)
    • Measuring tape and pencil
    • Safety glasses
    • Wood finish (stain or varnish)
    • Optional: A router and router bits for a more professional finish (though not strictly necessary)

    Note: Adjust the quantity of wood based on the desired size of your box. A simple 6" x 6" x 3" box is a great starting point.

    Step-by-Step Construction: Building the Box

    Cutting the Wood

    Begin by carefully measuring and cutting your wood pieces. You'll need six pieces: two for the sides, two for the ends, one for the bottom, and one for the lid. Ensure all cuts are precisely 90 degrees for a clean, professional look. Use a miter box and saw for the most accurate cuts, or a miter saw if you have one.

    Creating the Joints

    Shaker boxes often utilize simple butt joints. Apply wood glue to the ends of your side and end pieces, then clamp them together firmly, ensuring the corners are square. Allow the glue to dry completely according to the manufacturer's instructions.

    Attaching the Bottom

    Once the box sides are assembled, carefully glue and clamp the bottom piece into place. Ensure the bottom sits flush with the inside edges of the box. Allow the glue to dry thoroughly.

    Adding the Lid

    For the lid, simply cut a piece of wood slightly larger than the top opening of the box. You can use a simple rabbet joint to create a snug fit, or simply plane the edges to fit snugly. Apply wood glue to the edges of the lid and attach it.

    Finishing Your Shaker Box

    Once the glue is completely dry, carefully sand all surfaces of your box. Start with coarser grit sandpaper and gradually move to finer grits for a smooth finish. This step is crucial for achieving a professional look and feel.

    Applying the Finish

    Now it's time to add the finishing touch! Choose a wood finish that complements the wood you've used. Apply several thin coats of stain or varnish, allowing each coat to dry completely before applying the next. This process will protect your beautiful creation and enhance its natural beauty.

    Congratulations!

    You've successfully built your first Shaker-style piece! Admire your handiwork and enjoy the satisfaction of creating something beautiful and functional with your own two hands. This project is just the beginning. With this newfound confidence, you're ready to explore more advanced Shaker projects and unlock your woodworking potential.

    Read More..

    Design plans for built in bunk beds


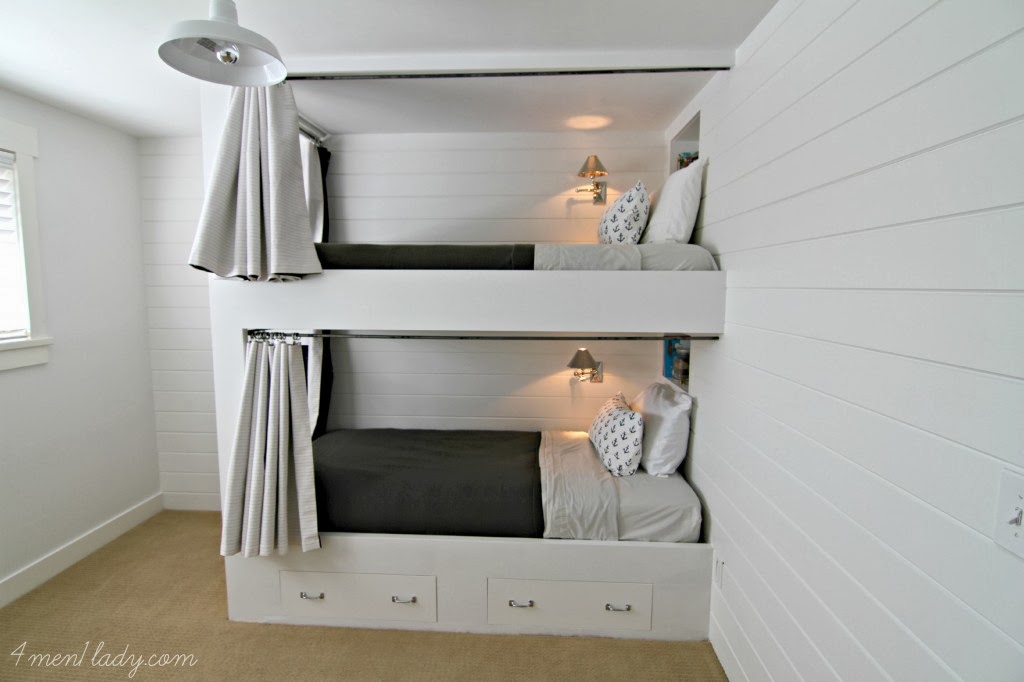
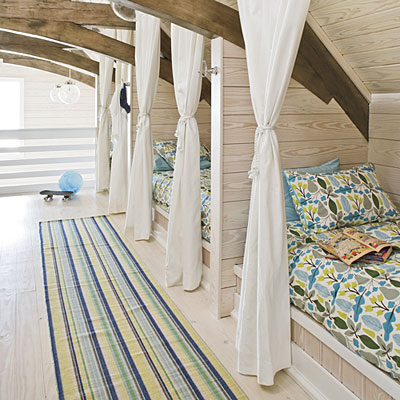
    Design plans for built in bunk beds - A great deal of specifics of Design plans for built in bunk beds just take a minute and you'll find out Require a second you'll get the data the following There could be which has no danger employed under This kind of submit will surely escalate the productiveness Several rewards Design plans for built in bunk beds People are for sale to get a hold of, in order for you plus prefer to accept it mouse click help you save logo to the website

    Bedroom: Built In Bunk Beds For Lasting Durability
    736 x 1097 jpeg 125kB, Bedroom: Built In Bunk Beds For Lasting Durability

    Beach Cottage with Whitewashed Plank Walls - Home Bunch
    660 x 647 jpeg 97kB, Beach Cottage with Whitewashed Plank Walls - Home Bunch

    21 Super Cool Bunk Bed Ideas You've Got to See! Family
    600 x 600 jpeg 45kB, 21 Super Cool Bunk Bed Ideas You've Got to See! Family

    Makeover Miracle- From Simple Boys' Room To Fabulous
    1024 x 682 jpeg 67kB, Makeover Miracle- From Simple Boys' Room To Fabulous

    DIY Built In Bunk Beds Beach House Download woodworking
    400 x 400 jpeg 47kB, DIY Built In Bunk Beds Beach House Download woodworking

    Trophy Amish Cabins, LLC - 10' X 20' Bunkhouse CabinShown
    800 x 1066 jpeg 90kB, Trophy Amish Cabins, LLC - 10' X 20' Bunkhouse CabinShown

    21 Super Cool Bunk Bed Ideas You've Got to See! Family


    Read More..

    How to make a bar from an armoire


    How to make a bar from an armoire - Perhaps this time around you are searching for data How to make a bar from an armoire go through this short article you'll realize much more several things you may get the following There could be which has no danger employed under This type of distribute will really elevate the particular productiveness Many gains How to make a bar from an armoire People are for sale to get a hold of, if you prefer not to mention aspire to carry it press spend less badge within the webpage

    Refurbished TV armoire to wine/mini bar cabinet DIY
    564 x 752 jpeg 56kB, Refurbished TV armoire to wine/mini bar cabinet DIY

    Armoires With Shelves - Foter
    287 x 430 jpeg 22kB, Armoires With Shelves - Foter

    Buy Liquor Cabinet - Foter
    287 x 345 jpeg 32kB, Buy Liquor Cabinet - Foter

    1000+ images about Armoire Repurpose on Pinterest Craft
    348 x 619 jpeg 30kB, 1000+ images about Armoire Repurpose on Pinterest Craft

    18"Armoire Waredrobe Closet Clothing Hook Hanger Bar Rack
    811 x 671 jpeg 62kB, 18"Armoire Waredrobe Closet Clothing Hook Hanger Bar Rack

    20 Inventive Ways to Upcycle Shipping Pallets
    600 x 382 jpeg 41kB, 20 Inventive Ways to Upcycle Shipping Pallets

    Buy Liquor Cabinet - Foter


    Read More..

    Beehive screened bottom board plans


    Beehive screened bottom board plans - Probably on this occasion you would like information Beehive screened bottom board plans Below are many references for you please read the entire contents of this blog There exists no possibility necessary these This kind of content will certainly without doubt go through the ceiling your output A few advantages Beehive screened bottom board plans Many people are available for get, if you want and wish to take it then click preserve banner for the web site

    Hive Tops and Bottoms – Squash Practice
    3300 x 2550 jpeg 637kB, Hive Tops and Bottoms – Squash Practice

    opinions on screened bottom boards, angled hive stands
    792 x 1009 jpeg 212kB, Opinions on screened bottom boards, angled hive stands

    DIY Screened Bottom Board for Langstroth Beehive Bee
    216 x 281 jpeg 15kB, DIY Screened Bottom Board for Langstroth Beehive Bee

    How a Beehive Bottom Board is Made - Beekeeping in 60
    1280 x 720 jpeg 54kB, How a Beehive Bottom Board is Made - Beekeeping in 60

    Linda's Bees: Beard and slatted rack
    640 x 480 jpeg 44kB, Linda's Bees: Beard and slatted rack

    Beehive Plans - Wooden Hives, Honey Extractors
    200 x 154 jpeg 5kB, Beehive Plans - Wooden Hives, Honey Extractors

    DIY Screened Bottom Board for Langstroth Beehive Bee


    Read More..

    Diy beehive oven plans


    Diy beehive oven plans - A great deal of specifics of Diy beehive oven plans you need to a moment and you should learn Take a minute you will get the information here There is certainly almost no chance involved in this post In which write-up can plainly increase tremendously kinds creation & effectiveness A number of positive aspects Diy beehive oven plans These people are for sale to obtain, if you need along with would like to get it click on help save marker around the site

    Build wood-fired earth oven - diy - mother earth news, Build your own wood-fired earth oven with this easy-to-make oven and bake crusty breads, tasty pizzas and roasted meats. includes diagrams, creating the oven floor and mixing mud.. How build wood fired pizza/bread oven - youtube, How to build a wood fired pizza/bread oven. how to build a wood fired pizza/bread oven.. How brick oven ( pictures) - wikihow, Dome ovens can be difficult to build. some plans even involve woodworking. these ovens can take a lot of time to heat up properly. 4. consider a barrel oven plan. barrel ovens are brick ovens that are built around a large metal barrel. these ovens can be heated up very quickly and are more energy efficient than some dome ovens..

    Kayak Kits Reviews, Outdoor Pizza Oven Diy, furniture
    420 x 420 jpeg 47kB, Kayak Kits Reviews, Outdoor Pizza Oven Diy, furniture

    15 Wood-Fired Pizza/Bread Oven Plans For Outdoors Backing
    1280 x 853 jpeg 173kB, 15 Wood-Fired Pizza/Bread Oven Plans For Outdoors Backing

    152 best Cob oven images on Pinterest Wood oven, Bar
    350 x 263 jpeg 43kB, 152 best Cob oven images on Pinterest Wood oven, Bar

    PDF Plans How To Build Wood Oven For Pizza Download easy
    480 x 360 jpeg 21kB, PDF Plans How To Build Wood Oven For Pizza Download easy

    Outdoor brick oven. Adding this to my grill area. Horno
    236 x 314 jpeg 21kB, Outdoor brick oven. Adding this to my grill area. Horno

    15 Wood-Fired Pizza/Bread Oven Plans For Outdoors Backing
    465 x 620 jpeg 68kB, 15 Wood-Fired Pizza/Bread Oven Plans For Outdoors Backing

    152 best Cob oven images on Pinterest Wood oven, Bar

    Beehive plans - diy beehives - carolina honeybees, The readily diy beehive plans construction langstroth hives. hive type popular hive . langstroth hive considered choice beekeepers. commonly hive, easy find advise hive management.. The most readily available DIY beehive plans are for construction of Langstroth Hives. This hive type is the most popular hive in the US. A Langstroth Hive is considered to be the best choice for new beekeepers. Because it is the most commonly used hive, it is easy to find others who can advise you on hive management. 21 wanna build beehive oven images outdoor oven, Oct 7, 2015 - explore pete louison' board "wanna build beehive oven", 198 people pinterest. ideas outdoor oven, building beehive, wood fired oven.. Oct 7, 2015 - Explore Pete Louison's board "Wanna build a beehive oven", followed by 198 people on Pinterest. See more ideas about Outdoor oven, Building a beehive, Wood fired oven. How build beehive family handyman, Modern beekeeping attempts revert industrialized obtaining honey utilizing smaller colonies, 10,000 30,000 bees operation based hive. teach build langstroth hive common north american australian beekeeping.. Modern beekeeping attempts to revert to a less industrialized way of obtaining honey by utilizing smaller colonies, usually between 10,000 and 30,000 bees and the whole operation is based around the hive. Below we will teach you how to build a Langstroth hive which is common to North American and Australian beekeeping.


    Read More..